Github Blog by Chirpy theme (1) Local 실행 및 환경 변수 설정하기
Chirpy theme로 Github Blog 만들기 (2025-01 기준)
(1). Local에서 Jekyll 설치 및 실행하기
Jekyll theme를 통한 Github 블로그를 만들기 위해서는 우선 본인한테 맞는 적절한 theme를 선정하는게 필요합니다. 다양한 theme 중, 저는 chirpy theme를 선택했고, template는 git clone을 통해서 local에 다운로드 받았습니다.
1
git clone https://github.com/cotes2020/jekyll-theme-chirpy.git
그리고, Local 환경에서 Jekyll 기반 Web을 실행하기 위해서는 아래 2가지 프로그램을 우선 설치해야 합니다.
위 프로그램을 설치하고 command prompt with ruby를 실행해서 아래 명령어를 통해 jekyll을 설치해 줍니다.
1
gem install jekyll
그 후에 chirpy theme를 clone한 경로에서 아래 명령어를 순차적으로 실행해 주면 됩니다.
1
bundle install
1
npm install && npm run build
1
jekyll serve
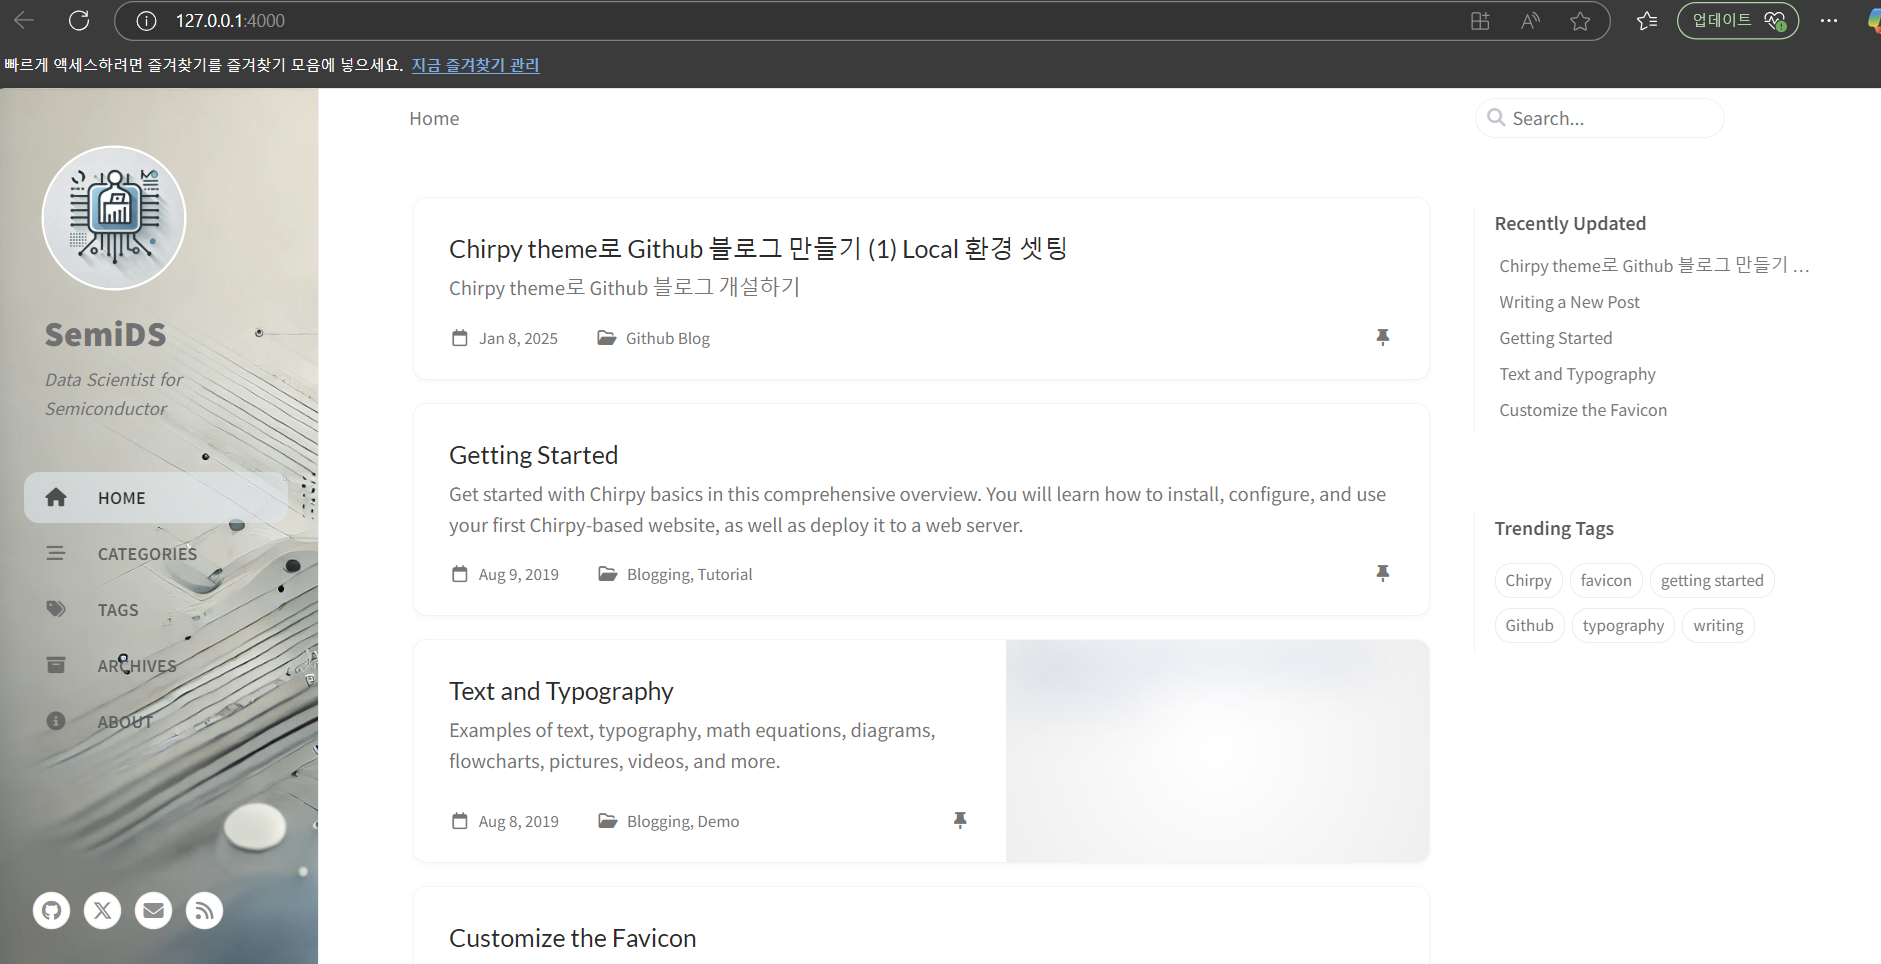
마지막 명령어 실행 후http://127.0.0.1:4000로 접속하면 local에서 build 된 블로그를 확인할 수 있습니다.
(2). _config.yml 파일 내 환경 변수 변경하기
Chirpy theme를 개인 블로그로 변경을 하기 위해서는 _config.yml 파일 내 환경 변수들에 대한 변경이 필요합니다.
아래는 _config.yml 내 존재하는 다양한 변수들 중 변경이 필요한 일부만 적어놓은 것으로, 아래 변수들을 본인 정보에 맞춰서 변경하면 됩니다.
1
2
3
4
5
6
7
8
9
10
11
12
13
14
15
16
17
18
19
20
21
22
23
24
25
26
lang: en # or ko-KR

timezone: Asia/Seoul

title: SemiDS # the main title

tagline: Data Scientist for Semiconductor # it will display as the subtitle

description: SemiDS's Blog toward Semiconductor Data Scientist

url: "https://daeheeseol.github.io"

github:
  username: daeheeseol # change to your GitHub username

social:
  name: SemiDS
  email: daeheeseol@gmail.com # change to your email address
  links: # 저의 경우는 github밖에 없어서 다른 SNS 링크는 삭제했습니다.
    - https://github.com/daeheeseol # change to your GitHub homepage

theme_mode: light # or dark

#cdn: "https://chirpy-img.netlify.app" # 아바타 사진 변경을 위해 해당 줄은 주석 처리

avatar: "assets/img/avatar.jpg" # 블로그 메인 이미지 변경을 위한 이미지 경로 입력
(3). _data/authors.yml에 author 추가하기
_data/authors.yml에 아래와 같은 형태로 author 정보를 추가해야 합니다. Author 정보를 추가하지 않으면 나중에 posting을 할때 by 뒤에 author 정보가 나타나지 않습니다.
1
2
3
SemiDS:
  name: SemiDS
  url: https://github.com/daeheeseol/
(4). 블로그 아바타 이미지 변경하기
블로그 좌측상단 메인 아바타 이미지 변경을 위해 파일을 assets/img/~ 경로에 저장한 후에 _config.yml 내 avartar 환경 변수를 수정하면 됩니다.
저의 경우는 아바타 이미지를 assets/img/avatar.jpg로 저장해두고 사용중 입니다.
(5). 블로그 사이드바 배경 이미지 변경하기
블로그 좌측 사이드바의 배경 이미지를 변경하기 위해서는 _sass/layout/_sidebar.scss 파일에 변경하고자 하는 이미지 경로를 아래와 같이 입력해주면 됩니다.
저의 경우는 사이드바 이미지를 assets/img/sidebar.jpg로 저장해두고 사용중 입니다.
1
2
3
4
5
6
7
8
9
10
11
12
13
14
#sidebar {
  @include mx.pl-pr(0);

  position: fixed;
  top: 0;
  left: 0;
  height: 100%;
  overflow-y: auto;
  width: v.$sidebar-width;
  border-right: 1px solid var(--sidebar-border-color);
  background: url('/assets/img/sidebar.jpg'); // 수정, 이미지 경로 입력
  background-size: auto 100%; // 추가, 이미지 크기에 맞춰서 수정
  background-position: -10px; // 추가, 이미지 크기에 맞춰서 수정
  ...
- 환경 변수 및 이미지 변경 후 블로그 메인 화면